DIY TRAVEL MAP
see step-by-step video tutorialsMaterials to Buy
Choose Cartridges by Brand


How to DIY Your Own Stickers
Schritt 1: Designen und Drucken

Erstellen Sie Ihre gewünschten Designs am Computer. Nutzen Sie Plattformen wie Canva, Crello oder Adobe Spark, um Ihre Karten und Reisebilder zu gestalten. Drucken Sie die Karte auf das Ölmalpapier und die Reisebilder auf das Klebepapier.
Schritt 2: Ausschneiden und Aufkleben

Schneiden Sie die gedruckten Designs aus. Markieren Sie die Reisebilder und kleben Sie sie mit Pfeilen oder Flaggen auf die entsprechenden Orte der Karte. Bringen Sie alle Elemente auf der Acrylplatte an.
Schritt 3: Fertigstellen

Ihr personalisiertes Reise-Souvenir ist nun bereit, aufgehängt oder aufgestellt zu werden!
What To Expect From The
Kamo Creative Studio
Lerne durch Schritt-für-Schritt-Anleitungsvideos, ein DIY-Projekt selbstständig zu meistern.
Erhalte hochwertige DIY-Werkzeuge und Materialien von Kamo.
Lasse dich während des DIY-Prozesses inspirieren, kultiviere deine künstlerischen Fähigkeiten, stärke dein Gefühl der Erfüllung und vertiefe menschliche Bindungen.
Tritt unserem Kreativstudio bei und teile die Freude an der Kunst mit anderen.
Blog Posts

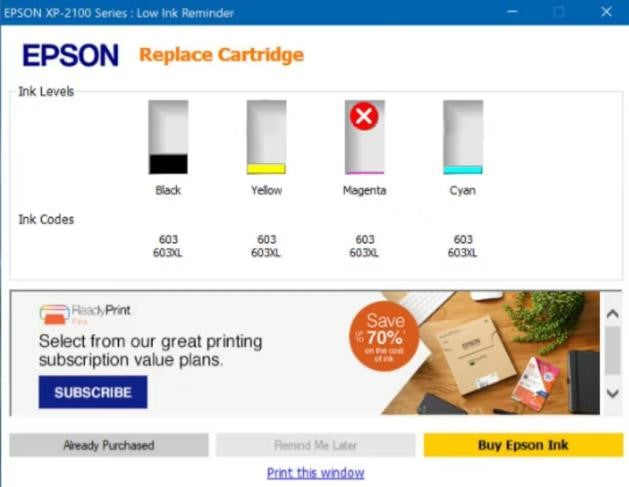
Cartuccia non riconosciuta - Stampante Epson
Problema con una Singola Cartuccia:

1. Identifica la cartuccia segnalata come problematica.
2. Esamina il suo chip di contatto (fascia di rame).
3. Pulisci delicatamente il chip usando un panno senza pelucchi o una gomma per matite.
4. Reinstalla la cartuccia e riavvia la stampante.
NOTA: 1. Per favore non toccare il chip quando installi la cartuccia.
2. Per favore non pulire il chip con alcol.

Problemi con Più Cartucce:

1. Se hai recentemente sostituito più cartucce e incontri errori:
2. Rimuovi tutte le cartucce appena installate.
3. Reinstalla le cartucce precedenti (anche se vuote).
4. Riavvia la stampante. Gli errori dovrebbero scomparire, indicando cartucce vuote.
5. Reinstalla le nuove cartucce una alla volta. Riavvia la stampante dopo ogni installazione fino a quando l'errore non riappare. Questo aiuterà a identificare la cartuccia difettosa.
Reset Totale:
1. Dopo esserti assicurato che i chip delle cartucce siano puliti e le cartucce siano installate correttamente, spegni la stampante e staccala.
2. Aspetta 30 secondi.
3. Collega di nuovo la stampante e accendila. Controlla se l'errore persiste.

Soluzioni Rapide per Stampa di Scarsa Qualità
Controllo degli Ugelli
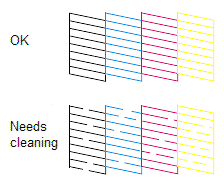
Prima di pulire la stampante, si prega di stampare una pagina di prova per verificare se il problema deriva da un ugello di stampa intasato.

1.Se il motivo si stampa correttamente, allora la stampante funziona come previsto. La radice del problema potrebbe trovarsi nel computer, cavo, software o nelle impostazioni specifiche della stampante.
2.Se il motivo del controllo degli ugelli non si stampa o presenta lacune o sezioni mancanti, potrebbe essere necessaria la pulizia della testina di stampa. In alternativa, potrebbe essere necessario sostituire la cartuccia.
Pulire la Testina di Stampa
È possibile pulire la testina di stampa tramite i pulsanti della stampante o il computer.


Se avete bisogno di istruzioni più dettagliate sulla pulizia della testina di stampa, si prega di fare riferimento a:
Allineare la Testina di Stampa
Se si notano linee mancanti o disallineamenti nella stampa, si prega di considerare l'allineamento della testina di stampa.

Figura 1: linee mancanti

Figura 2: disallineamento
Se avete bisogno di istruzioni più dettagliate sull'allineamento della testina di stampa, si prega di fare riferimento a:
Join our community
Explore Your Creativity With Kamo Creative Studio.
When you're ready, sign up from anywhere in the world. Feel free to contact us if you would like to chat or email us.


